Setup GitKraken Kepler: The Complete Guide to Agent-Driven Development
Setup GitKraken Kepler step by step: install, connect repos, and run AI coding agents safely with full human review each time.
Introduction: Setup GitKraken Kepler
To Setup GitKraken Kepler
is to give your team one clean, safe space to run AI coding agents.
Most old coding tools were never built for this kind of work. They break down
fast once several agents touch many files at once, and changes get lost or
overwritten with no clear record left behind.
Kepler
fixes this by acting as a full Agentic
Development Environment. It manages tasks, repos, and Git worktrees in one
place, so nothing slips through the cracks during daily use. This guide walks
you through the full setup
process, step by step, in plain, simple words, so your team can
start running safe automated workflows today.
What Is Kepler and What Problem Does It Solve?

Teams
often struggle when they hand feature work to AI agents. Normal coding tools do
not keep work apart well. They also miss the full picture across many repos at
once. When you Setup GitKraken Kepler, you get a full Agentic
Development Environment, or ADE for short. It brings tasks, repos, and safe
sandboxes into one system. This stops agents from writing over each other's
work.
Why Kepler Was Built This Way
Old
Git tools just show you commit trees after you make changes by hand. Kepler
works in a new way. It runs tasks, manages safe worktrees, and checks agent
output before anything reaches a pull request.
Who Should Use This Guide
This
guide fits any team that runs, or plans to run, AI coding agents on real work.
It also helps solo coders who want one clean setup, not loose scripts and open
terminal windows.
How to Install Kepler: The Setup Checklist
To
Setup GitKraken Kepler, you install the app and finish a short
checklist. Here is what your system needs before you begin.
|
Operating System |
Installer Type |
Minimum RAM |
Git Version Needed |
|
macOS |
Native DMG / Apple Silicon |
16 GB |
Git 2.40+ |
|
Windows |
64-bit EXE Installer |
16 GB |
Git 2.40+ / PowerShell |
|
Linux |
DEB / RPM / Tarball |
16 GB |
Git 2.40+ / OpenSSH |
Get
the installer for your system, then run it. The setup steps check your current
tools and set up file paths on their own, with no manual edits needed.
Signing In and Setting Up Your Profile
Open
the sign-in screen and add your name and email. This links your commits to your
real account, so each agent-made change traces back to you correctly, every
time.
Checking Your System Is Ready
Before
you launch your first task, check your Git version and shell setup match the
table above. This small check now saves you a stuck install later on.
Touring the Kepler Workspace
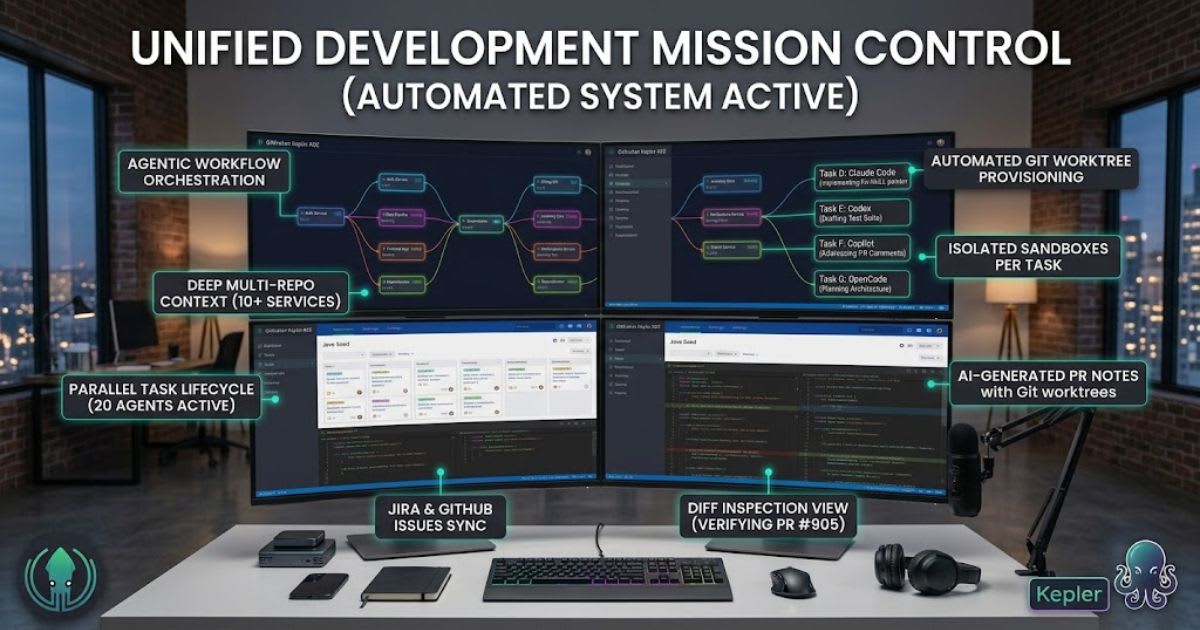
The
workspace gives you full control over active tasks and branches. Learning this
layout is the first real step toward using Kepler well each day. You can see
active sessions, changed files, and new commands, all from one dashboard. This
keeps your project clear, without you digging through raw Git commands each
time.
Key Panels to Know
Look
for the Todo list, live terminal docks, and the main commit graph. These three
spots cover most of what you use each day, from tasks to agent checks.
Setting Up and Connecting Your Repositories
Connecting your repos the right way stops broken links later on. You can link local folders, set up remotes, and prep projects for agent work, all from one setup screen. Here is the basic flow. Your remote code, on GitHub, GitLab, or Bitbucket, syncs with your local project files. Kepler then builds safe task worktrees on top of that synced base, so agent changes stay sandboxed until you approve them.
Cloning or Starting a New Repository
To
clone one, paste your project URL and pick an empty folder. Kepler pulls branch
history and open pull requests right away. To start fresh, pick "new
repository" from the menu and set your root folder.
Linking GitHub, GitLab, and Jira
Connect
your accounts through normal sign-in steps. This links your issues and pull
requests straight into Kepler, so tickets sync with your team's daily work with
no extra setup.
How to Start and Manage Tasks
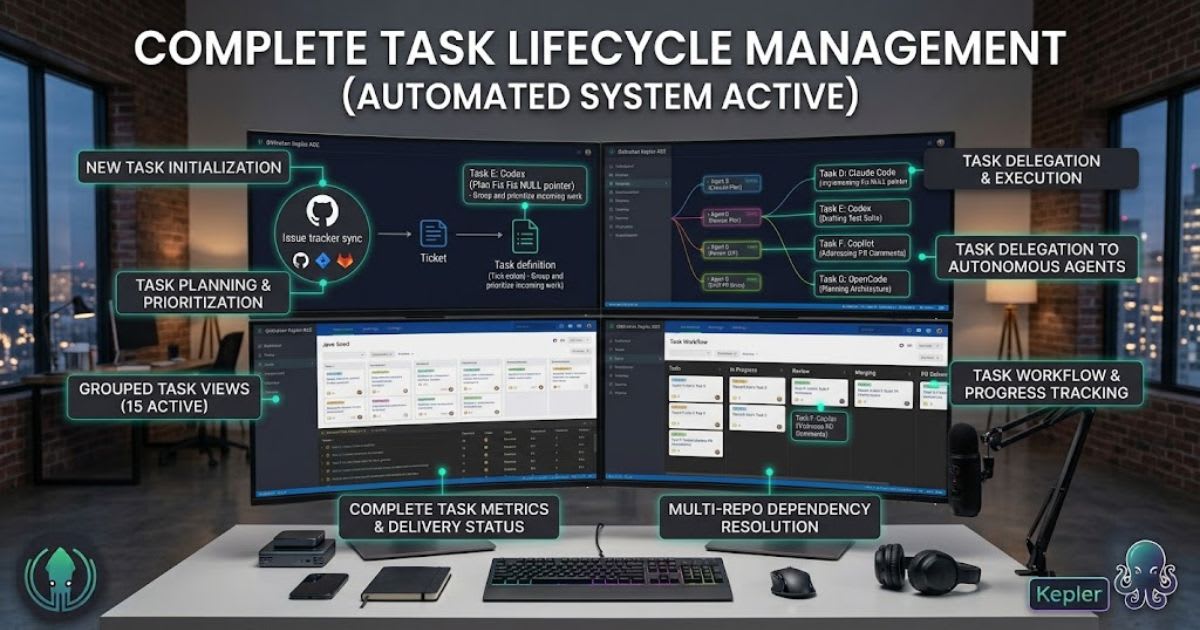
A
task in Kepler groups your goal, target branch, and agent session into one
spot. This keeps work tidy, instead of spread out across loose branches and
chat messages. Kepler can also pull tickets straight from your project board.
This cuts down on vague instructions, since the agent gets real ticket context
right from the start.
Starting From Existing Tickets
Pick
a ticket from the side panel to launch a task right away. Kepler pulls the
description, makes a branch, and sets up the agent session, all in one single
step.
Creating Untracked Tasks for Quick Tests
For
quick, private tests, use an untracked task. This gives you a sandbox to try
ideas without putting a branch on your team's shared board before it is ready.
Organizing Your Daily Todo View
The
Todo view shows active work, open reviews, and finished tasks in one place. You
can drag cards to adjust order, so your team always sees what matters most that
day.
Putting AI Agents to Work
Once
your task is set, hand it to an AI agent like Claude Code, Codex CLI, or
another connected tool. Kepler passes the right file paths and instructions on
its own. Keep your API keys stored in Kepler's locked vault. This lets agents
run safely, with no keys ever sitting out in plain text anywhere in your
project.
Key principle: handing real coding work to an AI agent takes a clear
task, a safe sandbox, and a real human check before anything ships.
Using Quick Actions
Kepler
offers one-click steps like Plan, Review, and Fix. These handle common jobs
fast, so you are not typing the same notes over and over for routine work.
Steering the Agent With Custom Prompts
You
can guide an agent mid-task through the built-in terminal. If it takes a wrong
turn, add a note or fix, and it adjusts its next step based on your input.
Following Agent Work in Real Time
When
several agents work at once, you need a clear view of what each one is doing.
Kepler shows active branches and sessions right inside its live commit graph. Watch
for the WIP marker. It flags work still in progress and live agent sessions, so
you always know what is not yet final before it turns into a real commit.
Managing Multiple Repos Without Conflicts
Big
projects often share code across several parts at once. Kepler tracks linked
branches across these repos, so agents do not step on each other's work by
accident.
Reviewing and Committing Agent Code
Always
check AI code before it becomes part of your project. Kepler's diff view shows
each new, changed, or removed line, in green and red, so nothing hides from
view. Check each change at the line level. This catches small bugs early, well
before they reach your main branch or touch your live product in any way.
Staging Changes and Writing Clear Commits
You
can stage just part of a file if needed, and undo staged changes if you spot a
mistake fast. When you commit, write a clear note that says what changed and
why.
Managing Branches and Pull Requests
Keep your main branch stable. Keep agent work on its own separate branch instead. Kepler lets you drag one branch onto another to merge, so joining finished work stays quick and simple. When branches conflict, Kepler shows both versions side by side. You pick the right lines, confirm the result, and move on, with no digging through raw conflict markers.
Pushing Changes and Opening Pull Requests
One
click pushes your checked commits and drafts a pull request on GitHub or
GitLab. This keeps your review process fast, while still giving your team a
clear paper trail.
Best Practices for Using Kepler Well
A
few simple habits keep your repos clean as your team scales up agent-driven
work. These matter even more once several people run tasks at the same time.
|
Focus
Area |
What
To Do |
Why
It Helps |
|
Commit
habits |
Write
small, clear commits |
Easier
reviews and rollbacks |
|
Branch
cleanup |
Delete
branches after merge |
Keeps
your repo tidy |
|
File
hygiene |
Use
a solid .gitignore file |
Keeps
junk files out of Git |
|
Daily
syncing |
Pull
changes before new tasks |
Fewer
painful conflicts |
Common Setup Mistakes to Avoid
Skipping
a proper .gitignore file is one of the most common slips teams make. This lets
build files, and worse, private API keys, end up in your commit history by
accident. Set this up before your first real task, not after. A few minutes
here saves you real cleanup work later, once agents start generating files
across your project.
Rushing the Initial Repo Setup
Some teams rush through
checks when they first set up Kepler, just to save time. This often costs more
time later, once a task fails midway due to a missing tool or wrong Git
version.
Setting a Realistic Timeline
Plan for a short learning stretch right after you Setup GitKraken Kepler. Most teams feel at ease with daily use within the first week, once they run a few real tasks through the full check flow. Do not expect to master every feature on day one. Start with simple, single-repo tasks. Move to bigger, multi-repo work only once your team trusts the review and merge process.
Final Thoughts
To
fully Setup GitKraken Kepler is to gain a real system for safe,
AI-driven work. It keeps agent tasks separate, checked, and clearly tracked
from start to finish. Start with one small task, get used to the review flow,
then scale up to bigger, multi-repo work once your team trusts the process.
Frequently asked questions
Can you use GitKraken with GitHub?+
Yes. GitKraken connects directly to GitHub accounts. You can clone, push, pull, and manage GitHub repos right from the GitKraken interface.
Is GitKraken safe to use?+
Yes, it is a widely used, established Git client. It does not change how Git itself works — it just gives you a visual layer on top of standard, secure Git operations.
What is the difference between GitHub and GitKraken?+
GitHub is a cloud platform that hosts your code and repos online. GitKraken is a desktop app that gives you a visual interface to manage Git, whether your code lives on GitHub, GitLab, or Bitbucket.
Is GitKraken Desktop free to use?+
GitKraken offers a free tier with some usage limits, alongside paid plans for more repos and features. Check GitKraken's official pricing page for current details, since plans can change.
Is there a free alternative to GitKraken?+
Yes. Options like GitHub Desktop, Sourcetree, and the standard Git command line are free tools that also help manage Git repos, each with a different look and feature set.
Related articles
 Guides & Tutorials
GitKraken Kepler Tutorial: Mastering the Agentic Development Environment (ADE)
Master the ADE with this GitKraken Kepler tutorial. Learn to manage multi-repo workflows and automate AI coding agents easily.
 Guides & Tutorials
Why Your AI Images Look Fake — and How to Fix It: Ultimate Guide 2026
Your AI images look fake? See why lighting, hands, and textures fail, and learn simple fixes for realistic, believable AI images.
 Guides & Tutorials
How to Write AI Image Prompts That Actually Work: Ultimate Guide
Write AI image prompts that actually work. Learn proven formulas, styles, modifiers, and tips to create better AI images in 2026.
New AI tool reviews, in your inbox.
Get new reviews and comparisons in your inbox. No spam, unsubscribe anytime.
Comments (0)
Be the first to comment.